‘ImageMagick’ is one of the famous open source libraries available for editing and manipulating Images of different types (Raster & Vector Images). magick is an R-package binding to ‘ImageMagick’ for Advanced Image-Processing in R, authored by Jeroen Ooms.
magick supports many common image formats like png, jpeg, tiff and manipulations like rotate, scale, crop, trim, blur, flip, annotate and much more.
This post is to help you get started with magick to process, edit and manipulate images in R that could be anything from just file format conversion (eg. png to jpeg) or annotating R graphics output.
magick is available on CRAN and also on ropensci’s github.
#installing magick package from CRAN
install.packages('magick')
#from Github ropensci library - note: requires RTools
devtools::install_github('ropensci/magick')
Let us load the library and read our first image or images from the internet with image_read()
#Loading magick package
library(magick)
#reading a png image frink image
frink <- image_read("https://jeroen.github.io/images/frink.png")
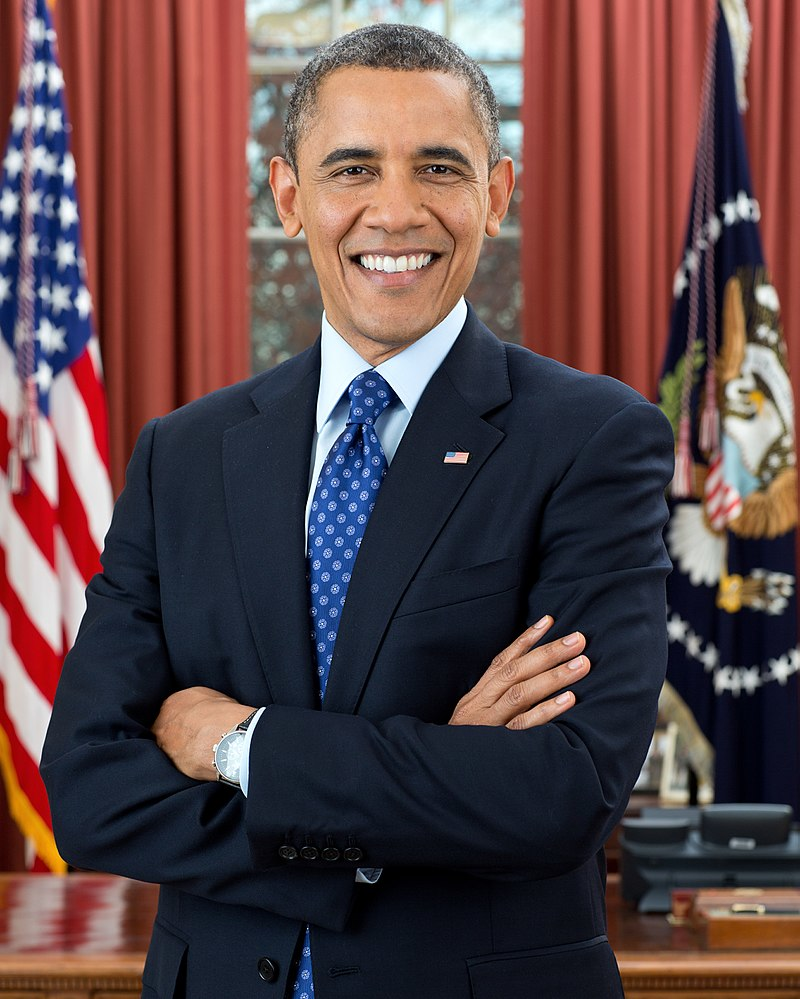
#reading a jpg image ex-President Barack Obama from Wikipedia
obama <- image_read('https://upload.wikimedia.org/wikipedia/commons/thumb/8/8d/President_Barack_Obama.jpg/800px-President_Barack_Obama.jpg')
Make sure you have got an updated version of curl package installed for the successfully reading image as mentioned above.
We can get basic details of the read images with image_info()
#image details
image_info(obama)
image_info(frink)
image_info(obama)
  format width height colorspace filesize
1   JPEG   800    999       sRGB   151770
image_info(frink)
format width height colorspace filesize
1    PNG   220    445       sRGB    73494
Communicating with RStudio, magick lets you print/display image in RStudio Viewer pane.
#displaying the image
print(obama)
Whether you are a web developer or you are putting together a powerpoint deck, Image File Format Conversion is one of the operations that we would end up doing and this is literally an one-liner using magick‘s image_write().
#Rendering JPG image into SVG
image_write(obama, path = 'obama.svg', format = 'svg')
Below is the PNG format of Obama Image that we read in from Wikipedia:
But you might be wondering, “Hey! This is just basic Image processing. Didn’t you tell this is advanced?” And Yes, Here comes the advanced stuff along with a good news that magick supports pipe %>% operator.
This is what we are going to do:
-
1. Take the Original Obama Image and Apply Charcoal Effect to it
2. Composite Frink Image along with it
3. Annotate some text – considering Obama would’ve dealt with Confidential data – Let it be CONFIDENTIAL stamped on the image
4. Finally, Rotate the image slightly and write/save it.
#Applying Charcoal effect to Obama's image
#and compositing it with frink's image
#and finally annotating it with a text
image_charcoal(obama) %>%
  image_composite(frink)  %>%
  image_annotate("CONFIDENTIAL", size = 50, color = "red", boxcolor = "pink",
                 degrees = 30, location = "+100+100") %>%
  image_rotate(30) %>%
  image_write('obama_with_frink.png','png')
Gives this output:

How does the output image look? Artistic isn’t it ;)!
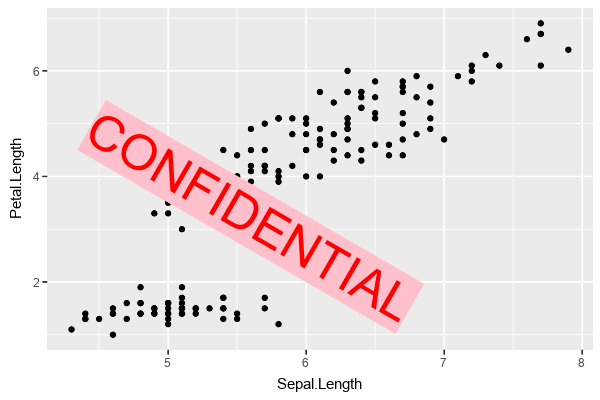
But this is not Data Scientists want to do every day, instead, we play with Plots and most of the time want to annotate the R Graphics output and here’s how you can do that with magick‘s image_annotate()
library(ggplot2)
img <- image_graph(600, 400, res = 96)
p <- ggplot(iris) + geom_point(aes(Sepal.Length,Petal.Length))
print(p)
dev.off()
img %>% image_annotate("CONFIDENTIAL", size = 50, color = "red", boxcolor = "pink",
                       degrees = 30, location = "+100+100")  %>%
  image_write('conf_ggplot.png','png')
Gives this output image:
This is nothing but a glimpse of what magick can do. Literally, there is a lot of magic left in magick. Try it out yourself and share your thoughts in comments. The code used here can be found on my github.
References:
the magick library is awesome
Yes it is 🙂
Yes it is 🙂 @richardwjdisalvo:disqus