In part one of this tutorial, I showed how to install R and LaTeX for Eclipse. Sadly, Eclipse doesn’t yet know where to find these resources, so we need to configure it appropriately. Statet provides a wizard to walk you through the setup, but I find the wizard difficult to follow. However, we can set up everything from the menus.
If you have used Eclipse for other projects, such as Java or Python, the setup for Statet will be familiar and intuitive. But if this is your first time on Eclipse, there’s a lot to take in. Basically, there are four steps to go through.
- Switch to the Statet perspective
- Tell Eclipse how to use R. This requires two configurations.
- Tell Eclipse how to use LaTeX
- Tell Eclipse where to find your pdf viewer
Let’s walk through each of these steps in detail.
The Statet perspective
Eclipse offers its users a way to organize programming projects by displaying the files and resources these projects require and by coordinating their use. A perspective is Eclipse speak for what you see after launch: the display of windows, folder trees and other features you might want for your work flow. You can change the displays during your session. Eclipse remembers what you did and launches a new session with the same perspective that you had upon shutdown.
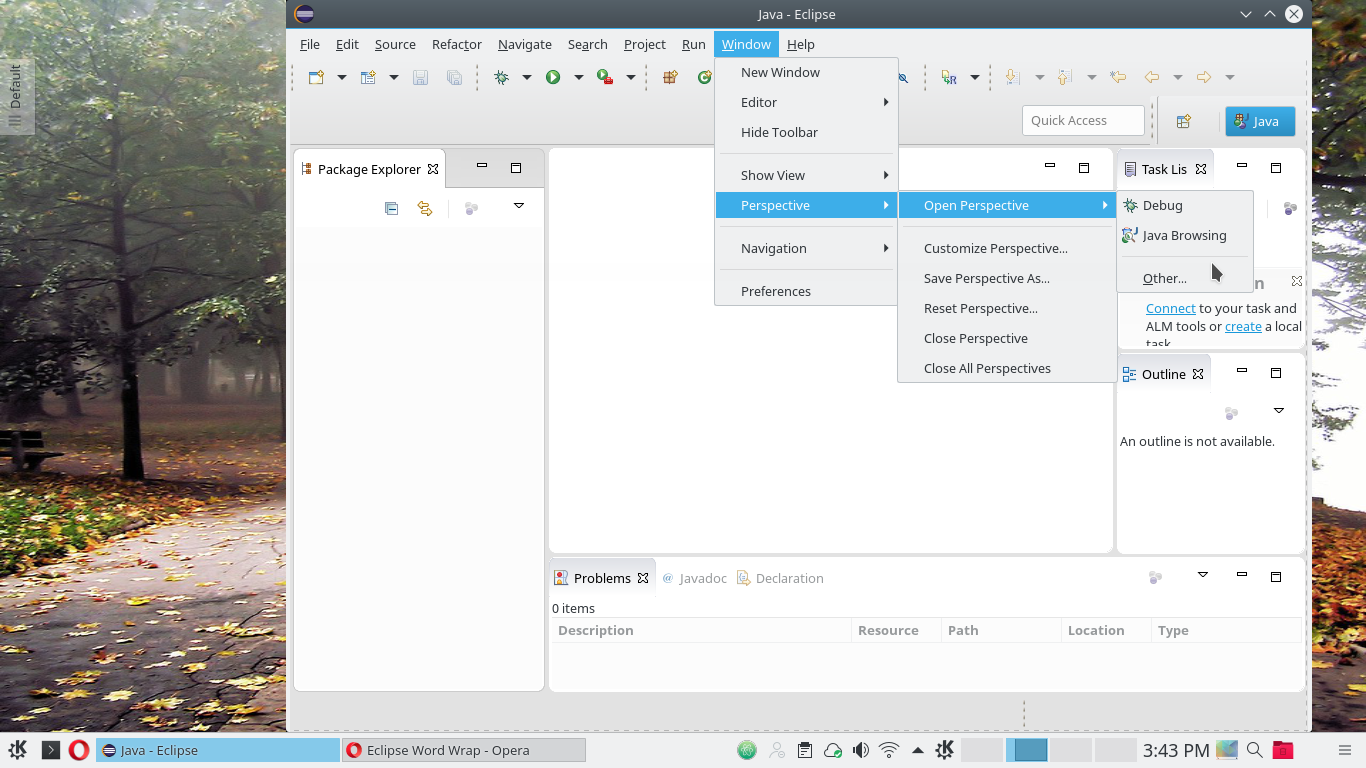
The previous tutorial ended with a clean install of Eclipse, to which we had just installed Statet. Upon relaunch, we get the default Java perspective. You can see the word Java in highlight at the upper right corner. To get the Statet perspective, select Window -> Perspective -> Open perspective -> Other.
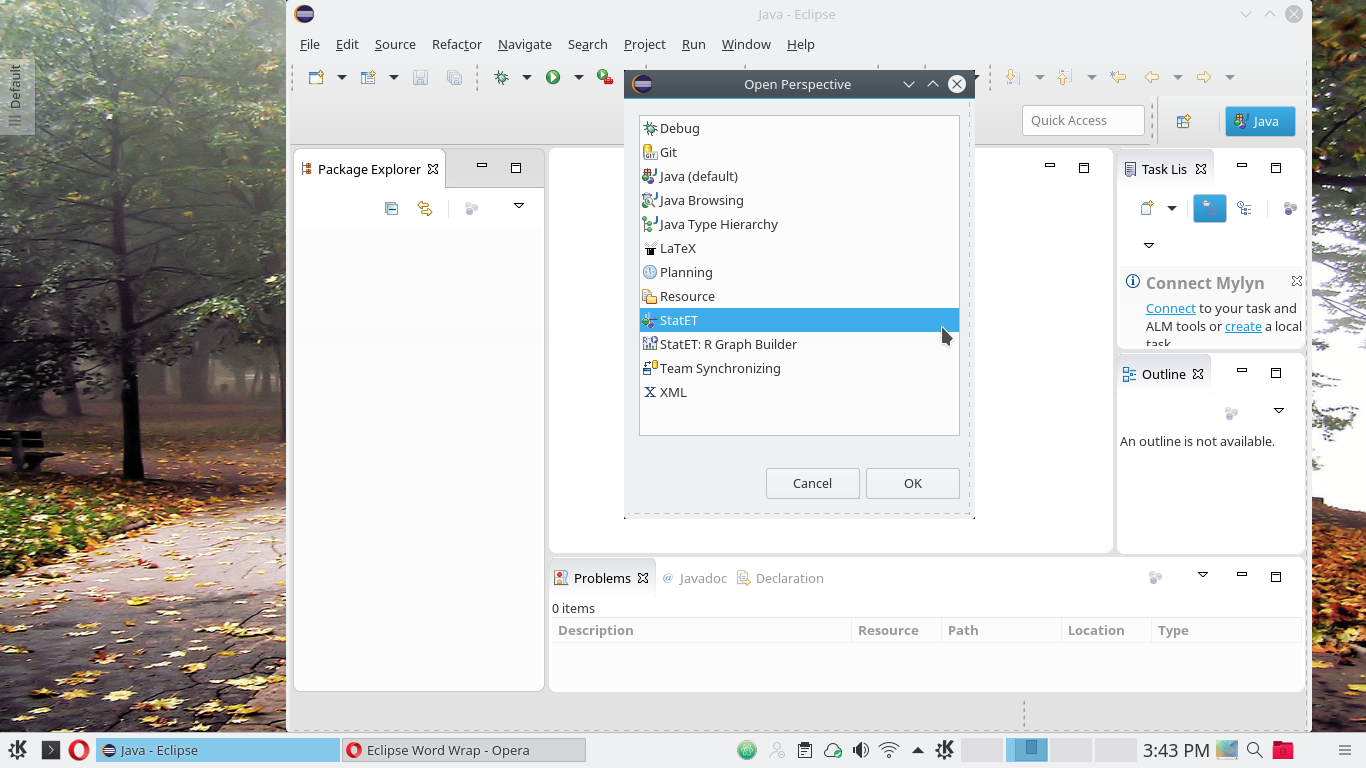
This gives you the list of all installed perspectives. Select Statet from the list.
Done! Now you should see the default layout of the Statet perspective. Note that Statet appears in highlight to the right of the Java button. We can switch between these perspectives by clicking their respective buttons. Alternatively, you can go through the drop down menu as before, selecting Window and Perspective.
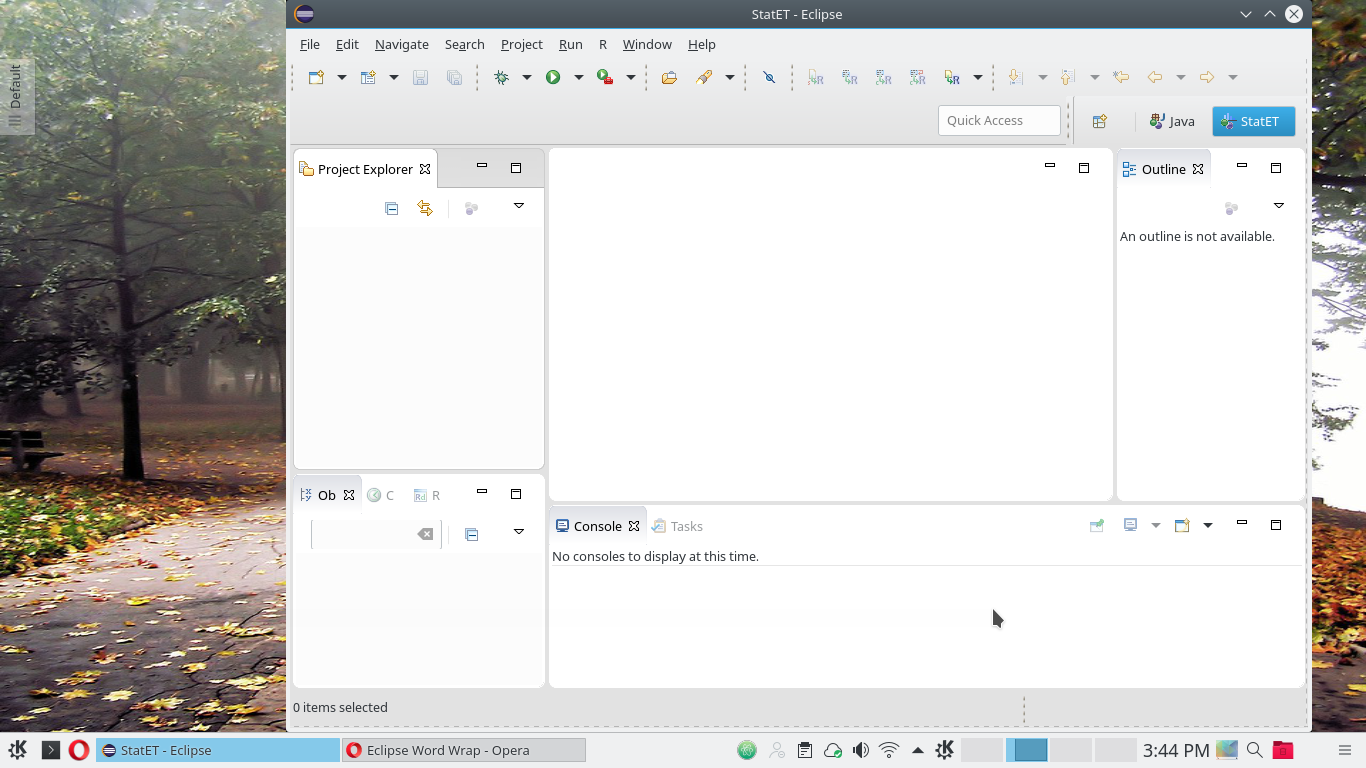
A quick tour of the Statet perspective
I’ll talk more about working with this perspective in a later post, but for now, let’s take a quick look at what you get.
- A menu bar with the usual items. We have already used Window and Help.
- An icon toolbar with shortcuts to useful items from the menu bar.I usually work with the icons.
- Upper left: the project manager. When we create projects and add project folders, they will show up here.
- Top centre: a blank window for Editors. To Eclipse, anything that creates a document or displays a document is an Editor. This is where you will write your Sweave documents. It’s also where the compiled pdf’s will appear.
- Bottom centre: a blank window for the R console.
- Upper right: Outline. This panel provides an outline of your LaTeX/Sweave document. Section headings and sub-headings appear as indents. The outline also references any R chunks you may have in your document.
- Lower left: other options. Click on the tabs for the object browser, R help files and other useful information. The Object browser gives you the output from the R
search()function.
None of these goodies are actually available to us yet, because we need to set up the Run configurations for R and LaTeX.
The R run configuration
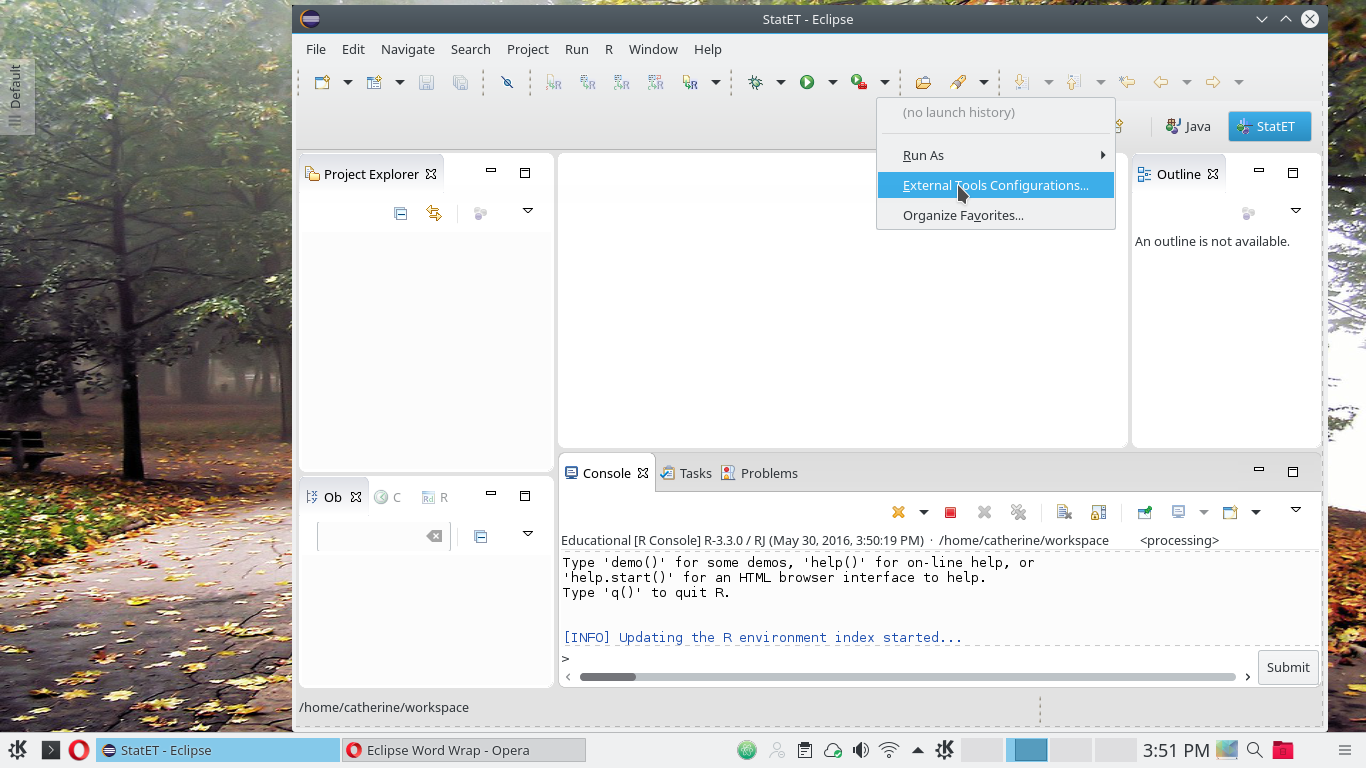
Let’s try something that doesn’t work! Select Run -> Run as, or click on the context menu next to the green menu button.

Typically, the green button will run the previous configuration, but since we have no launch history, nothing happens! We need to create a Run configuration first.
Select Run Configurations to get the configuration screen. Select R Console and click the document icon at the upper left to get a template for the new configuration.

Note the error message along the top of the screen: The R environment preferences of the Workspace are invalid. They are invalid because we haven’t set them up yet. We’ll get to that later.
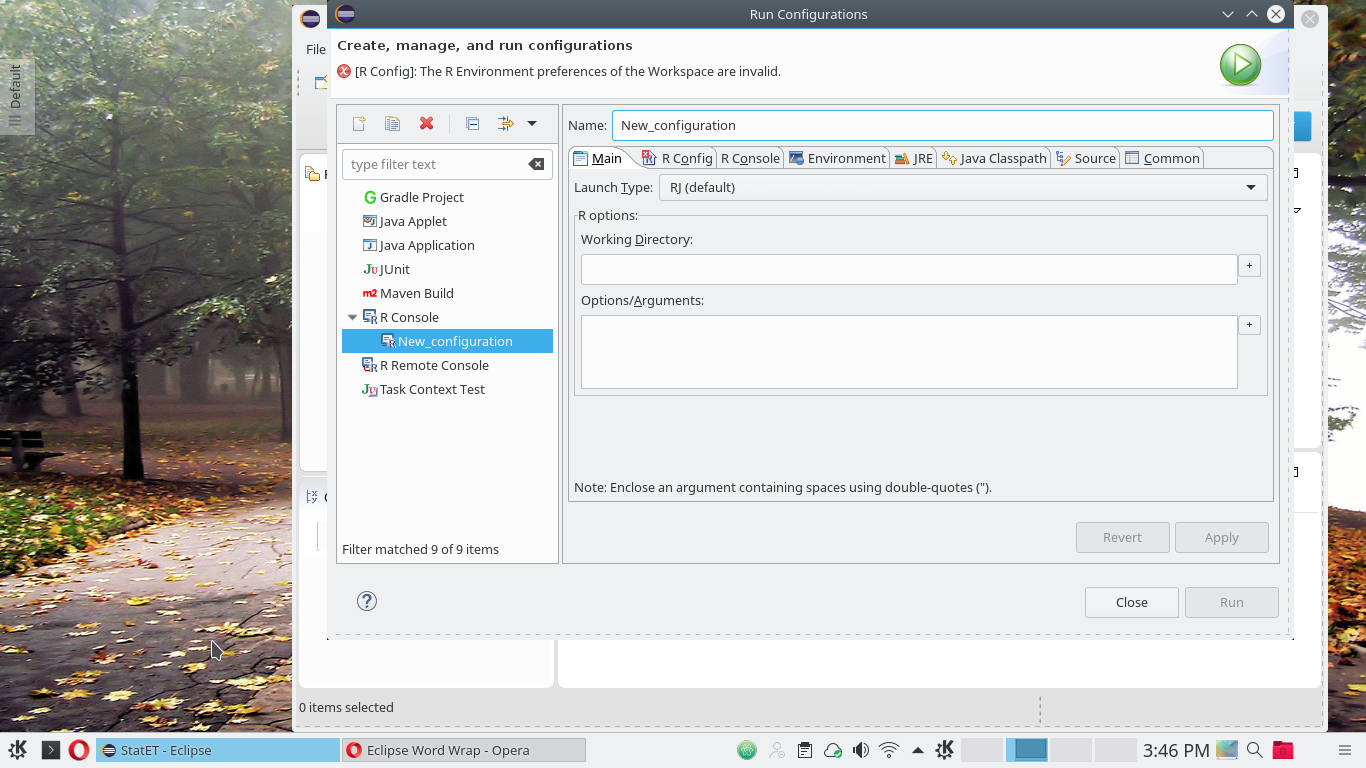
Give the configuration a useful name. I’m running R 3.3.0, Essentially Educational, so I name the configuration Educational. Then enter the working directory. The plus sign to the right of the form opens to allow you to browse to the folder of your choice.
You could configure a separate configuration for every R project and direct R to launch from the project folder. I typically use the Eclipse workspace here, and change my working directory from the R console as needed.

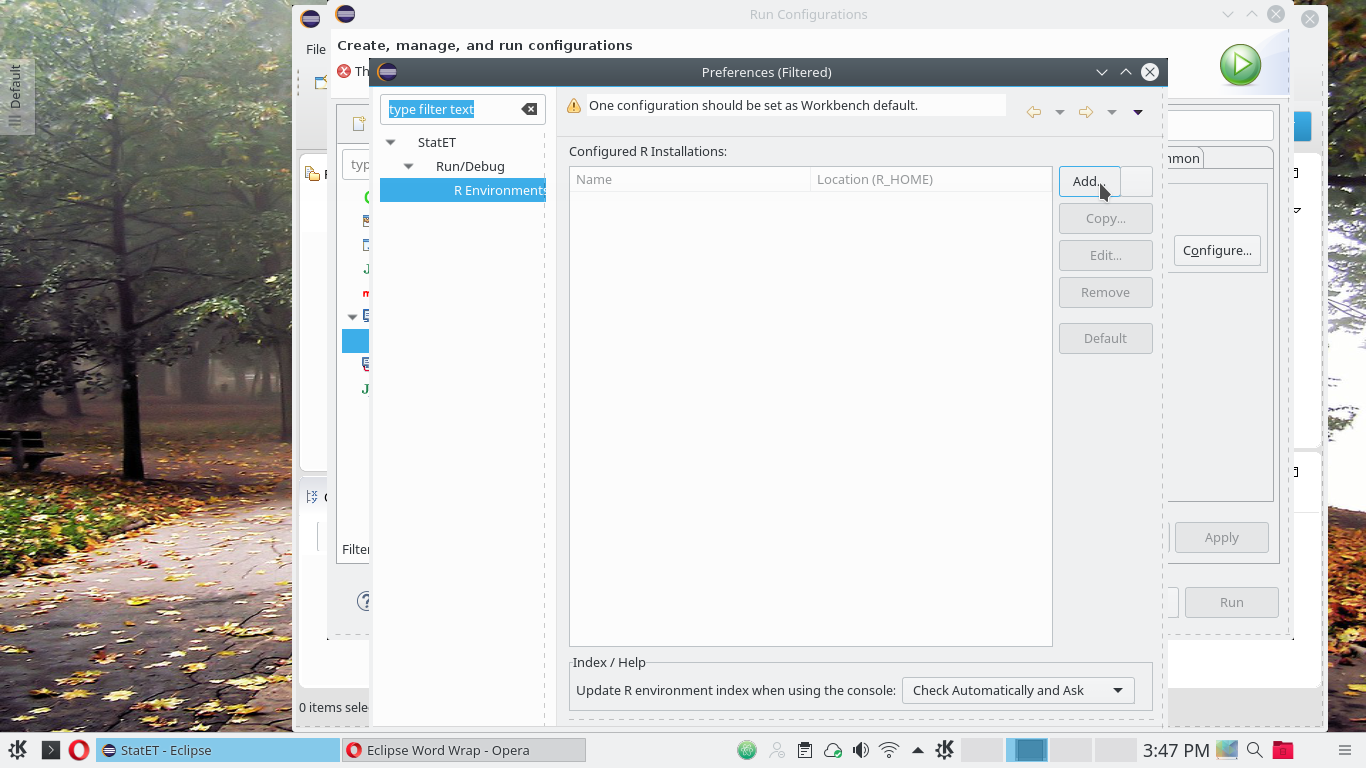
Click Apply to save the changes and select the R Config tab. This is where we tell Eclipse which version of R we want to use. Currently, we have no configurations, so let’s add one.
The R configuration screen
Click on Select configuration and then click on Configure.

Select R Environment and click Add.
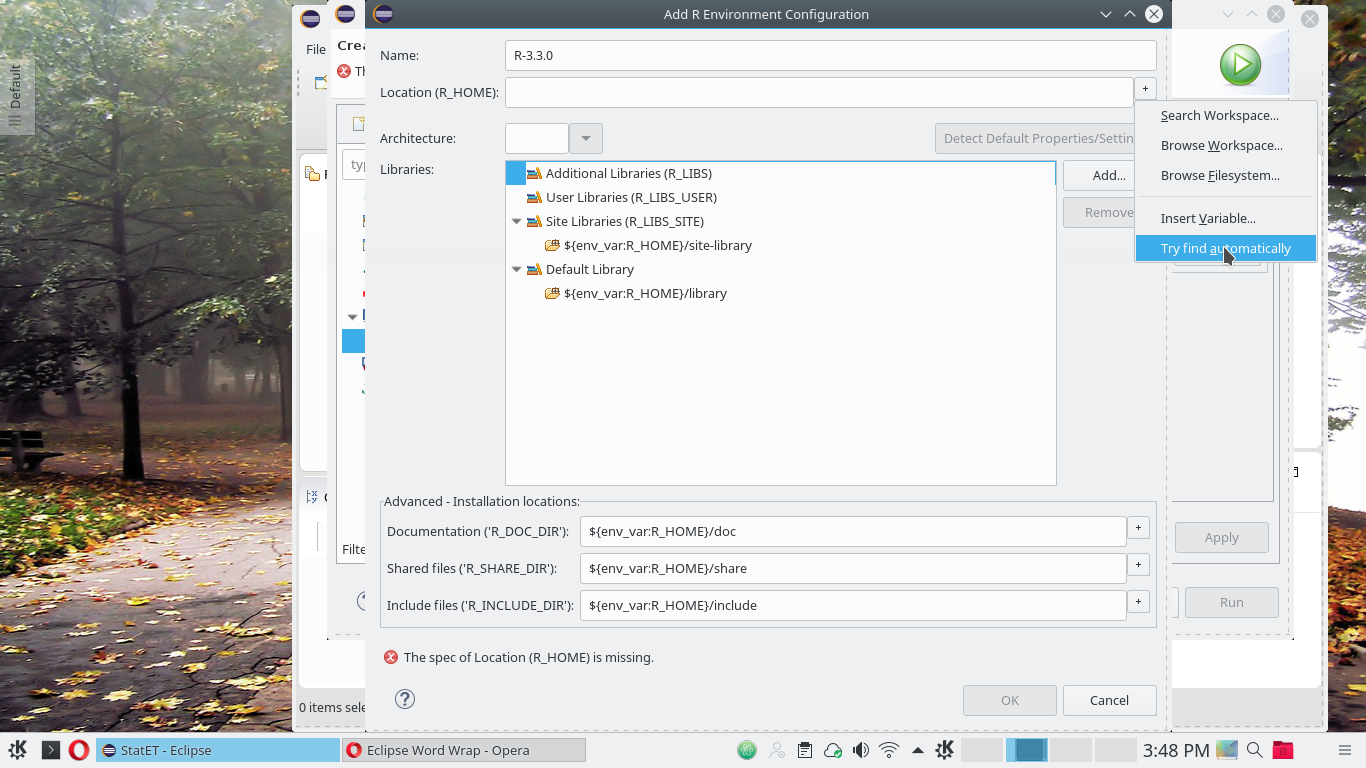
If you installed R using the default settings, this screen will typically complete itself with little prompting from you.
- Give the environment a name.
- Insert the location of R home. The context menu item try find automatically usually works. If it fails, open an R console (outside of Eclipse!) and run
R.home(). This will give you the absolute path to the top level directory of your R installation. Use this value.
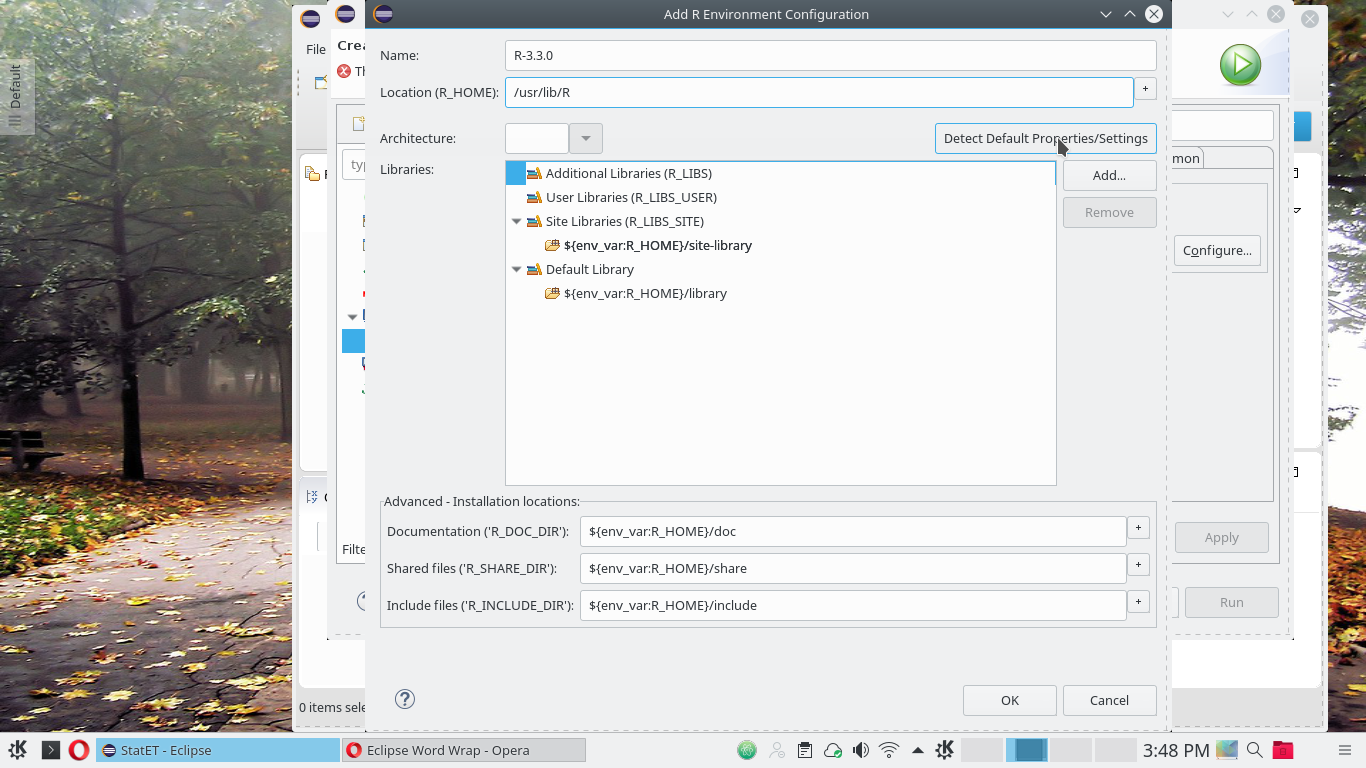
Now click on Detect Default Properties/Settings. Click OK to complete the screen.
Eclipse can build an R index to enable access to package help files. There are several options here from the drop down menu. I use Check and update automatically. And finally, don’t forget to click Apply.

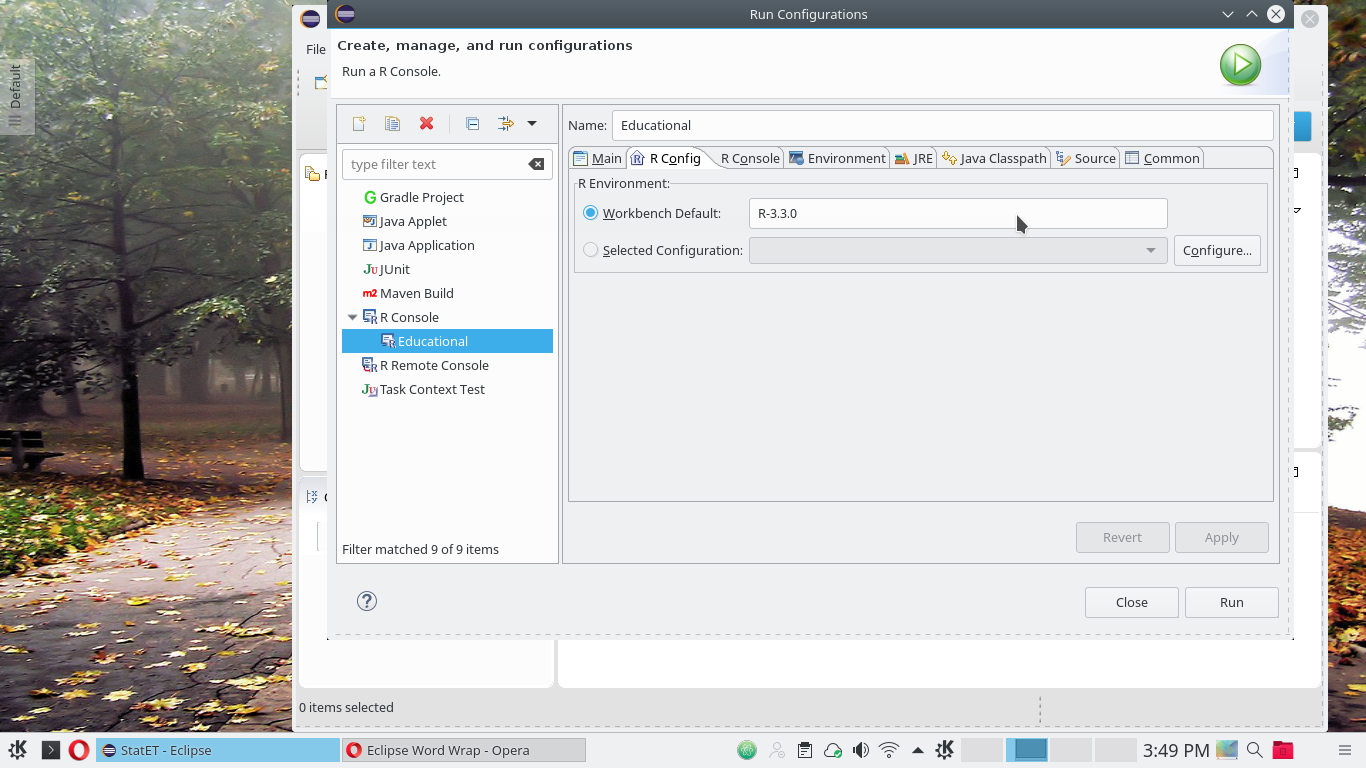
Back to the Run Configuration template
The previous step returns you to the Run Configuration template. But this time, we can supply an R environment. With only one version of R on my system, I select the default. If you are running several versions of R, you can create a configuration for each and select the one you need for the current Run configuration. Complete the screen and click Apply.
Finishg up
The default settings from the remaining tabs typically work fine. However, if you need to specify additional R environment variables, a specific version of Java or working directories, you can do this here. For me, I only need to make a few adjustments to the Common tab.
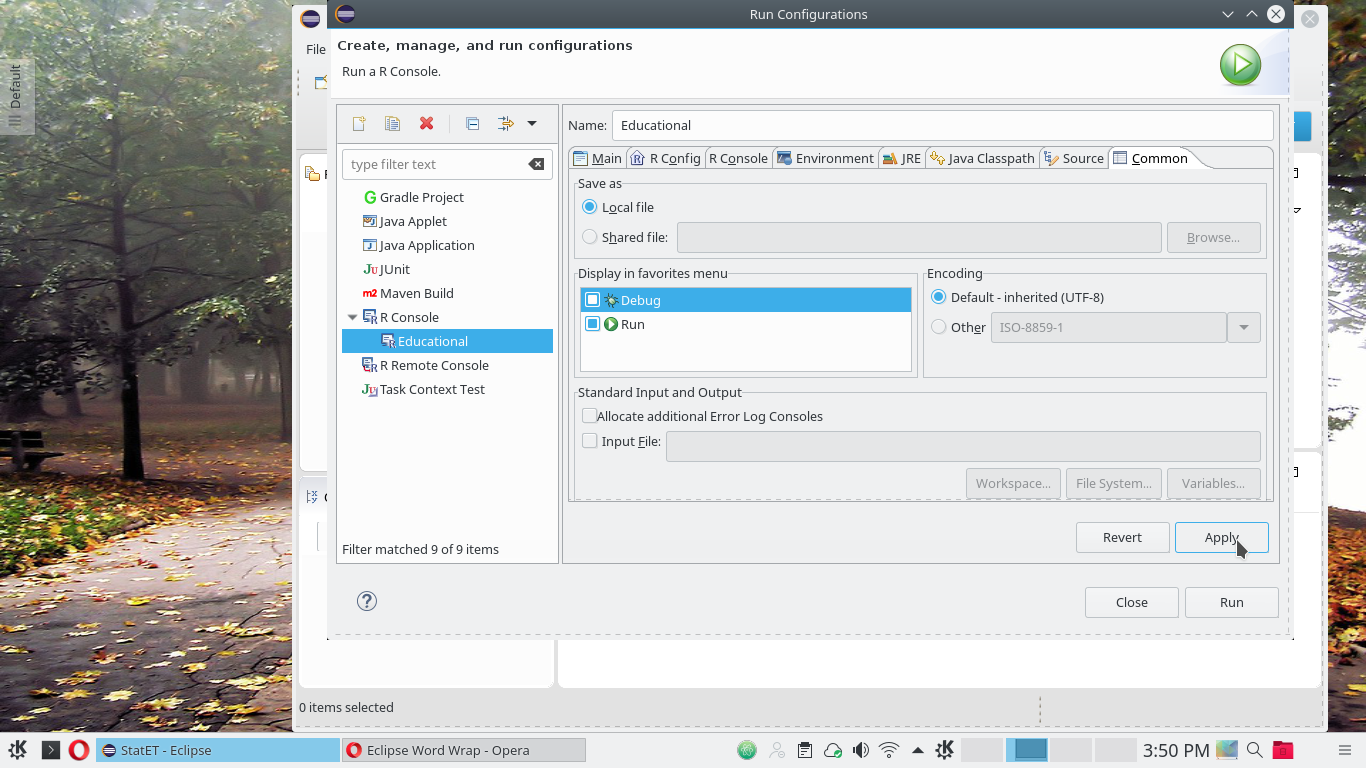
I select Debug and Run. This lets my configuration appear on the menus of the green Run button and of the bug shaped Debug button.
You may also want to adjust the coding. The template defaults to the default encoding of your operating system. On my Linux box, this is UTF-8. Windows users may have a different default.
Encoding for Windows users in bilingual workplaces
If you are running Windows as an English speaker, your default will be cp1250. If you need to write a document in a different language, cp1250 may not play well with laTeX’s babel package. If you find that your pdf’s look weird, check the encoding under the Common tab and switch to utf-8, or whatever you need.
And finally …
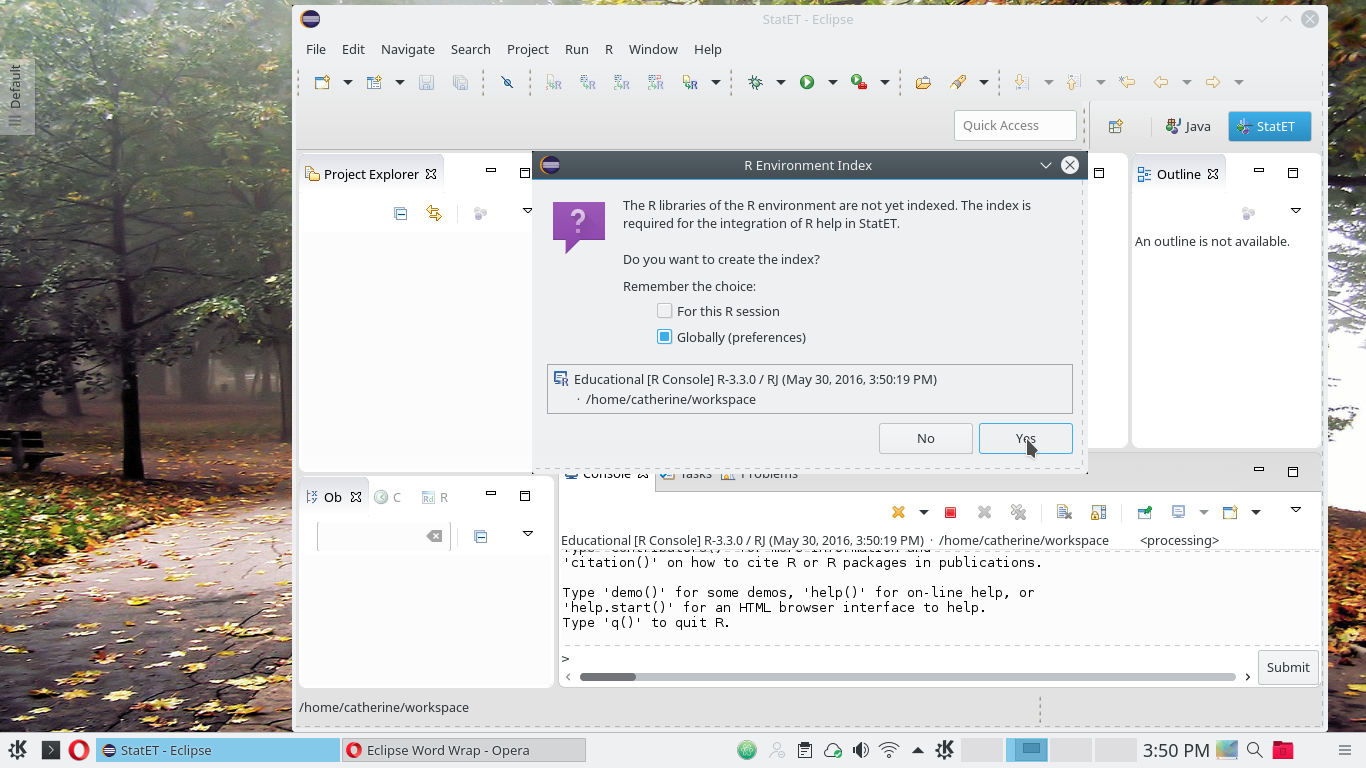
Click Apply one last time to save the configuration. Now click Close to leave the template, or Run to test your work. An R console should launch in the console window of Eclipse.
The first time, you will have to wait a few moments before you get the R prompt while the system indexes your help files. I choose the global index option. Subsequent launches will go a lot faster.
Configure LaTeX
If you followed the previous steps, you should now be able to run an R console from within Eclipse. You can also create R scripts, save and run them, as I show in a different tutorial. But the power of Statet lies in allowing you to embed R commands in a LaTeX document, thus combining the analysis and its documentation in one place. To get this up and running, Eclipse needs to know where to find LaTeX and how to run it.
After what you’ve been through with configuring R, configuring LaTeX should be straightforward. Let’s walk through the details.
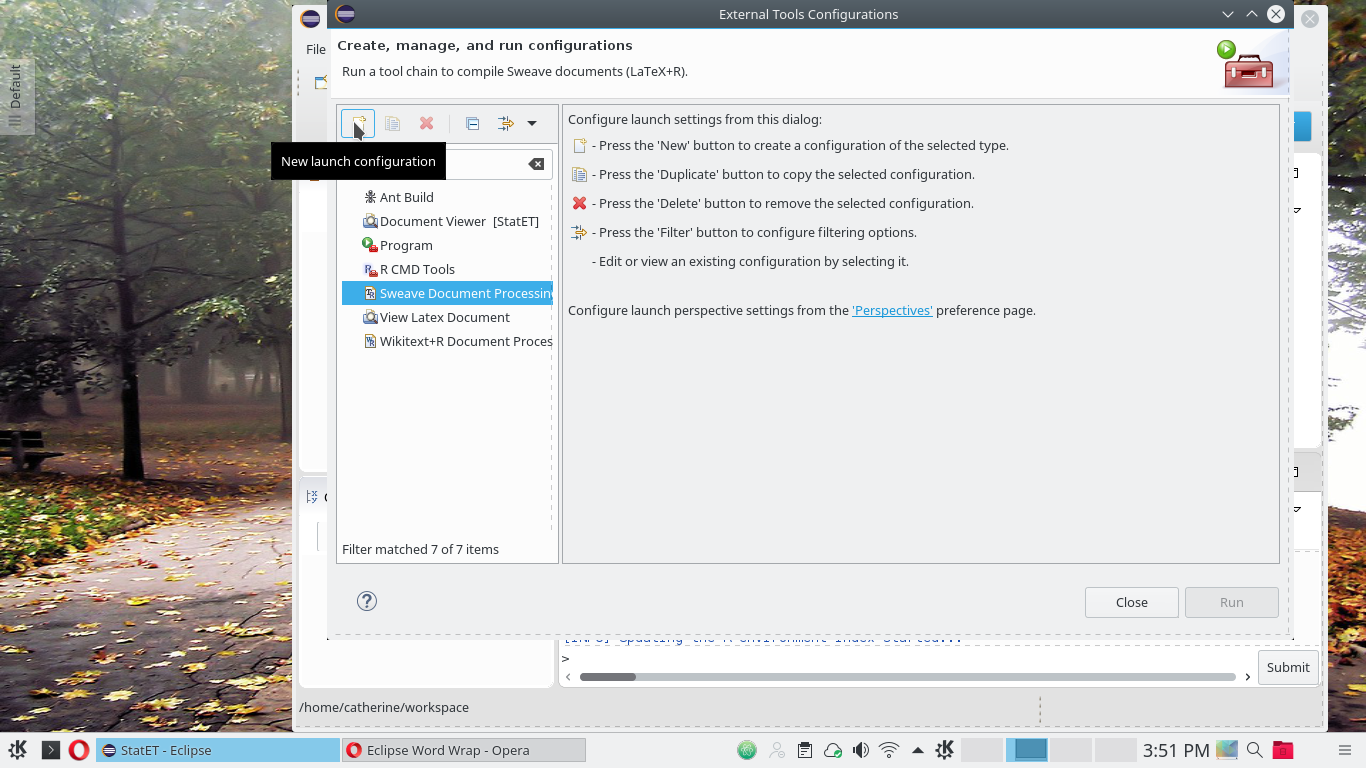
Select Run -> External Tools -> External tools configuration from the menu, or select the context menu next to the green arrow with the briefcase and External tools configuration.
The external tools configuration menu is similar to the Run configuration menu that we saw before. Highlight Sweave document and click on the icon for a new launch configuration.
The configuration menu appears. Give the configuration a name. Most of the defaults work fine as they are, but you probably want change the build option. Click on the tab marked LaTeX.

This screen lets you control the LaTeX build. The default creates a dvi file, which is a bit old fashioned. I prefer to use pdflatex to obtain my document as a pdf.
Select the menu arrow next to dvi and select pdflatex from the menu.
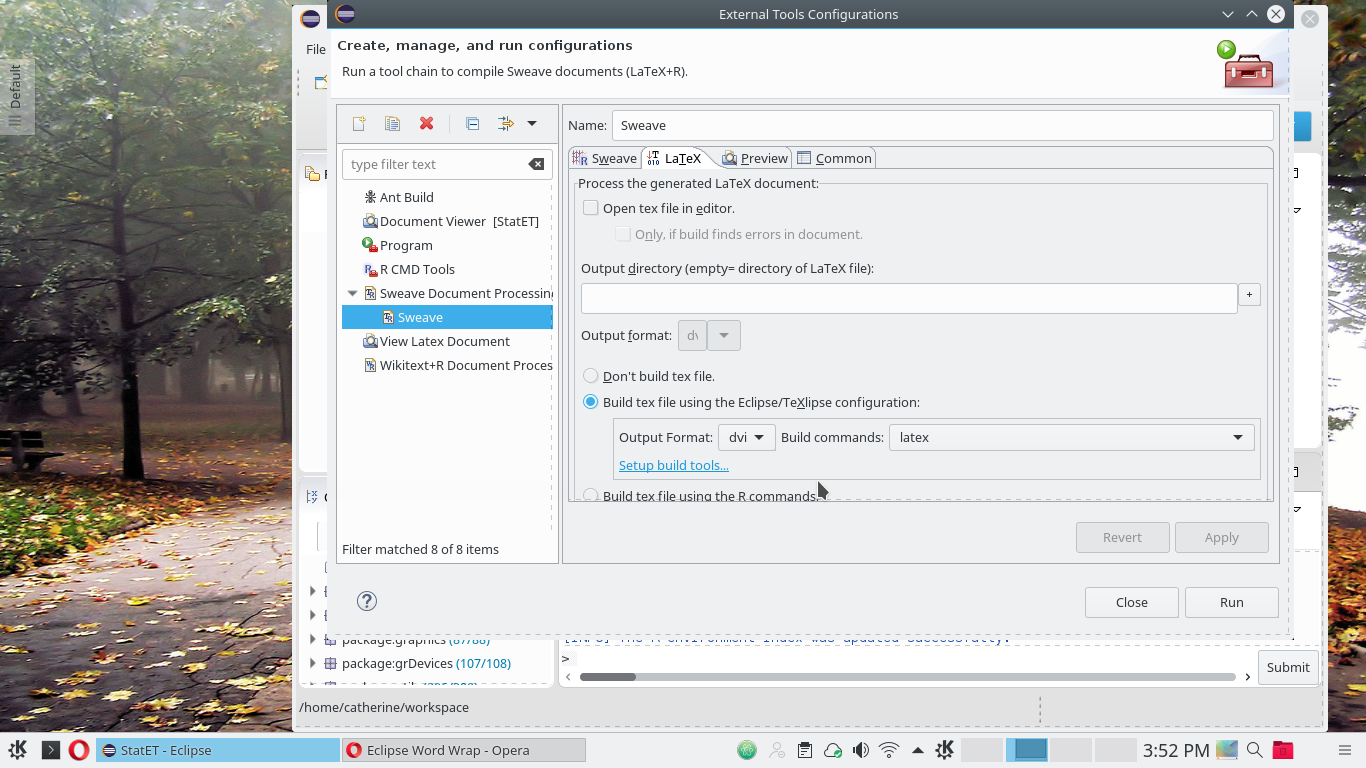
And don’t forget to click Apply to save the change.

Select tab Common and select External tools. This causes the Sweave configuration to appear under the External Tools icon on the toolbar. Check that the encoding suits the language you plan to use. Finally, click Apply.

Close the menu. Eclipse is now configured for Sweave.
Setting the PDF viewer
When Sweave compiles your document, it will attempt to display the PDF in the editor window using the default Eclipse viewer. Current versions of Eclipse do not specify the default PDf reader, so we need to do that now.
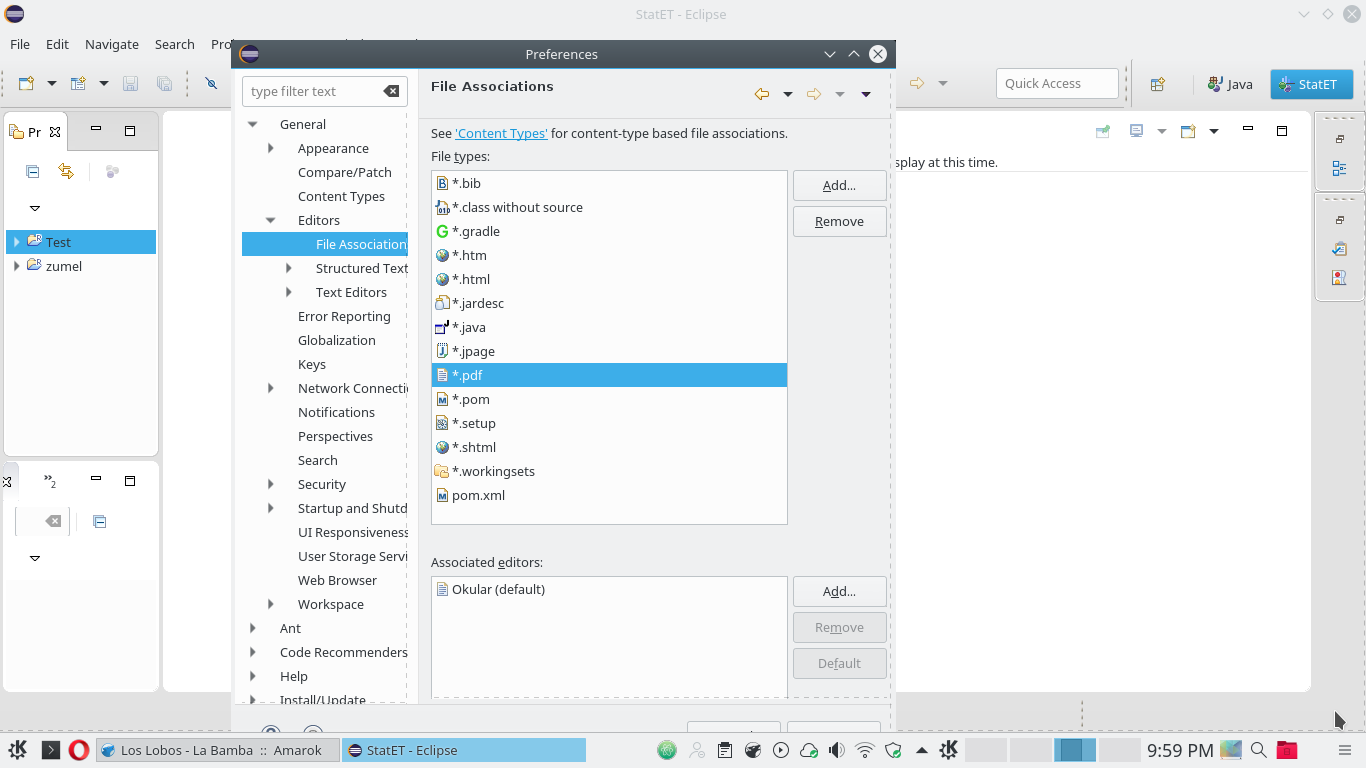
Select Window -> Preferences to get the preferences menu. Select Editors -> File associations. Click Add.
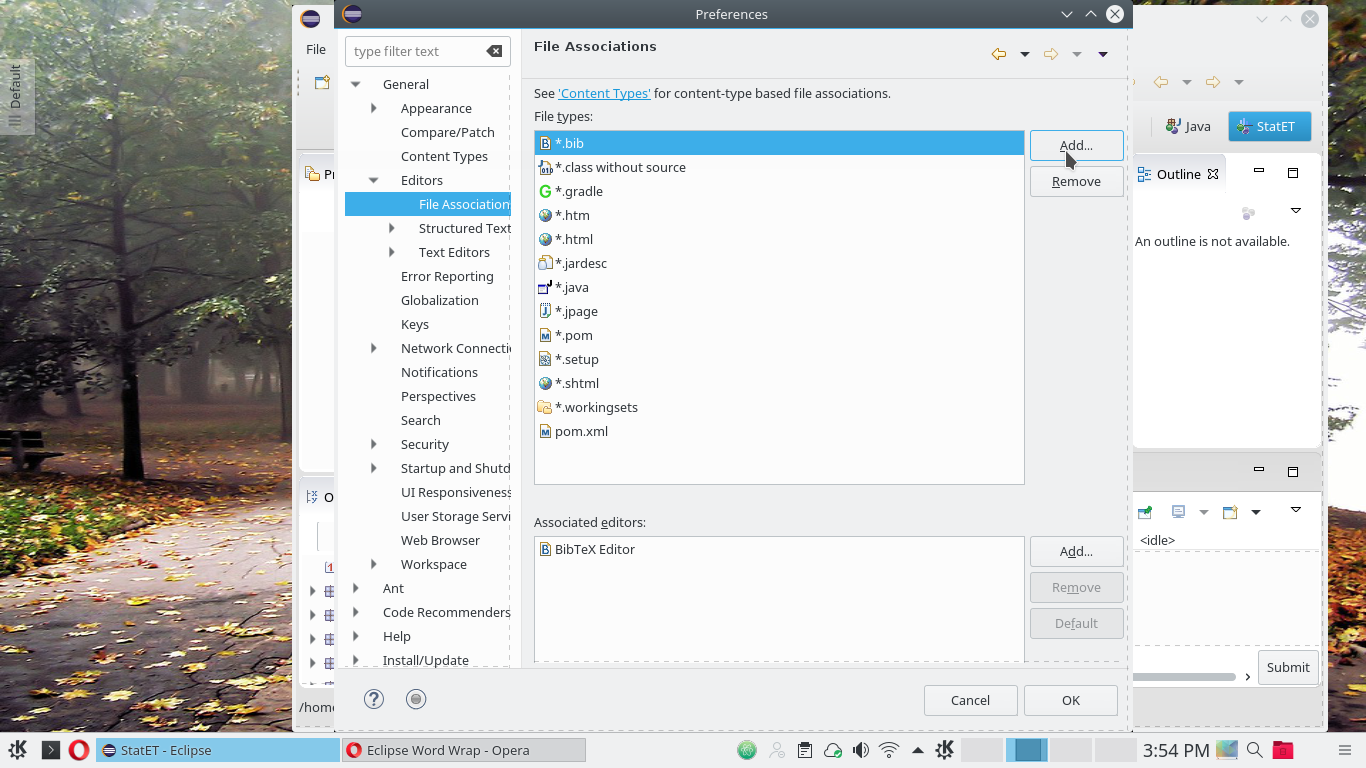
Enter *.pdf in the form. Click OK
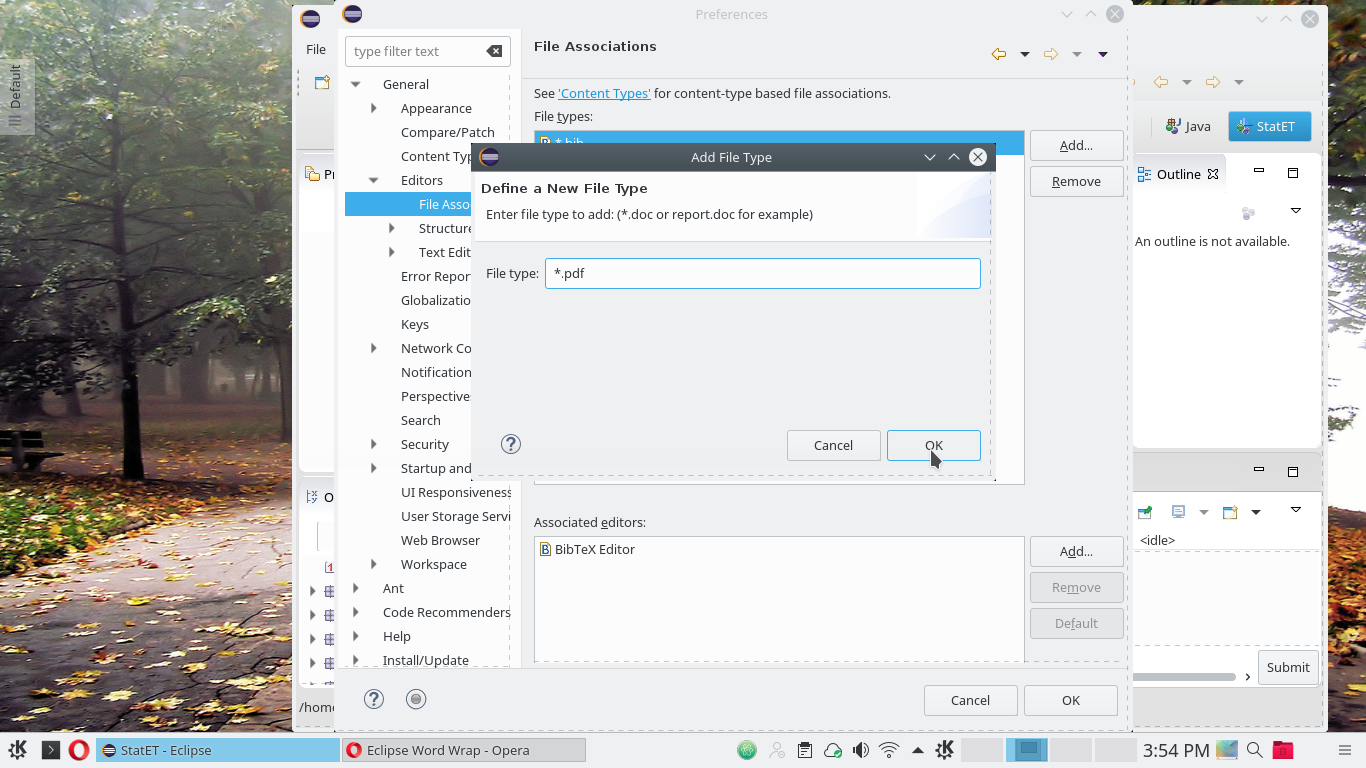
We have just added a new file extension. Now, we need to add an associated viewer. Click Add next to the window of Associated Editors. A list will appear of applications internal to Eclipse, followed by external applications. I am running Kubuntu, so I select Okular. On a Windows system, you could select the Adobe Acrobat Reader, or whatever you have installed. It should appear on the list.
Troubleshooting
Congratulations! Grab a coffee and enjoy using R and Sweave in Eclipse. If you followed all the instructions as indicated, you should be able to compose a document in LaTeX with R code chunks and compile your work to a PDf document.
But what if it fails?
- Double check the previous steps.
- Ensure that you clicked Apply on every screen that has an Apply button. These are a bit random, so make sure you didn’t miss one of them.
- Fails often occur in completing the R configuration menu. In particular, make sure that you clicked Detect default properties/settings from the R-config menu.